Can I wear my sterling silver bracelet in a hot tub with chlorinated water?

Dear Paula,

I just placed an order for a sterling silver twist bracelet and am very excited to receive it. I was speaking to family members that own Sterling silver and they said it will turn black if I wear it in the pool or hot tub.I am thinking that my bracelet is made from better material and that I will not have this problem. Please let me know what you think about this matter.
I love the look of this bracelet and have been waiting to purchase it for quite a few years. I have had your website in my favorites and I finally made my purchase. Thank you for your time and patience. WS

bt2-classic-1

Hi WS,

The bracelet you ordered is made from sterling silver. I have had one for years and it is as shiny as ever – maybe once a year I wipe it with a polishing cloth.
But I have never worn one in a shower, bath, dishwater, pool, hot tub and wouldn’t recommend it because as you would learn if you google this search phrase “sterling silver chlorine”

One effect that chlorine can have on sterling silver is discoloration or tarnish. Discoloration happens when the copper in the alloy reacts with the chlorine. The discoloration can be either a light brown or black.

Also, silver is a very good conductor of heat so wearing jewelry in a hot tub would seem to invite discomfort…….just sayin’

Paula

To Polish or Not to Polish, That is the Question……….

We sell many used and vintage pieces that have from light to heavy patina and tarnish on them. We leave the choice of whether to polish or not to the customer.

Patina is the overall uniform darkening that occurs from aging. Patina adds a richness to vintage pieces. How much patina you like is personal preference, there is no right or wrong.

Tarnish, on the other hand, is a thin dirty film that appears on silver as it oxidizes. Tarnish, in my opinion, should be remove regularly using a mild method, such as with a buffing cloth.  Each of these pieces took about one minute to fully polish with a cloth.

Here is one of my favorite contemporary Hopi Man in a Maze bracelets (by Cyrus Josytewa) before buffing. Basically a dirty bracelet !

OLYMPUS DIGITAL CAMERA

BEFORE

30 seconds later - half done

30 seconds later – half done

DONE One minute of polishing

DONE One minute of polishing

Tarnish on polishing cloth

Tarnish on polishing cloth

Hubby’s favorite buckle (Stanley Gene, Navajo) has some nice patina and also has tarnish. I’m on the fence with this piece – I actually think I prefer the overall patina but he volunteered it for an example. A buckle makes contact with a lot of surfaces so even after the tarnish is removed, the buckles still has its character scratches.

BEFORE

BEFORE

Midway

Midway

AFTER

AFTER

Here are some more articles related to jewelry care:

Are you supposed to polish Navajo Pearls?

Cleaning Vintage Native American Jewelry

A reminder about jewelry polishing cloths

Paula

Are you supposed to polish Navajo Pearls?

Hi Paula,

I was looking at the stamped Navajo pearl necklaces and began to wonder – How do you polish these necklaces or are you supposed to polish these necklaces?

Thanks   Pamela

Stamped Navajo Pearls by Larry Pinto

Stamped Navajo Pearls by Larry Pinto

Hi Pamela,
It is a matter of personal preference. If you like patina, no polishing necessary.That’s why we leave the beads in our pawn shop as is – so the buyer can decide.
A lot of people prefer patina………and to satisfy those customers, Navajo bead makers also put an “instant patina” on their beads by adding a satin finish and antiquing on some of their beads such as this gorgeous necklace by Navajo Virginia Tso.
Antiqued Navajo Pearls by Virginia Tso
If you like shiny, you can use a soft silver polishing cloth. Leaving a little patina in the stamped portions just makes the stamping stand out more dramatically. Very pretty.
BD794-pinto-stamped-grad-1725-3
AT38-pouch-silverblue-300w
You can also keep them in an anti tarnish pouch if you want them to stay shiny.
AT33-38-pouch-brown-black-280wPaula

How do I get the artist’s name off the back of my collar?

Hello Paula,
Do you have any suggestions for removing the price and artist’s name written
in ink from the inside of the sterling silver collar that we just received. We are not
having any luck. Thank you.
Sandra

COL75-plain-tahe-2Hi Sandra,

Whoops !!  First of all, so sorry we missed removing the name from your collar. I know it must seem odd but it is normal operating procedure with Native American made jewelry to write the price and sometimes the artist’s name on the back of a pendant, bracelet, and in your case, a collar.  Usually a black sharpie pen is used which is pretty hard to rub off. Some artists and sellers even put a small coat of clear nail polish on the sterling silver and then write on that and/or put a coat of clear nail polish over what they have written.

Anyway, to make a long story short, here we use acetone or regular nail polish remover to take off the marker.  You can also use non-acetone polish remover – it will still work but take a bit longer.

Again sorry, that must have been during the holidays when we were wild people.

Paula

A reminder about jewelry polishing cloths

We sell polishing cloths that can be used to restore and maintain the shine on your sterling silver jewelry.

AT38-pouch-silverblue-300w OLYMPUS DIGITAL CAMERAThis enclosure that came with one of the cloths is a good reminder of what such cloths are designed to be used on…………and what they should NOT be used on.

Paula

scan0001

Black on the inside of a bracelet I bought in November

My name is Regina

I bought a cuff bracelet for Christmas it has turned black on the inside on one end, when we cleaned it with silver cleaner some of it came off but you can still see where it was, the black around the inlay on the front is coming off. My husband loves this bracelet and wears it all the time. He works in a office so it did not get damaged at work plus he is partial handicapped so he is not really active at home so we can not figure this out. It just occurred in the past few days. Please tell me I have something that can be done I paid 400.00 dollars for this bracelet. Regina

NBS327-lg-gold-bill-1 NBS327-lg-gold-bill-3 NBS327-lg-gold-bill-4

Hi Regina,

What you describe are normal signs of wear for a sterling silver bracelet that someone has used for over 7 months. (purchased Nov 2, 2012)

Black on the inside is natural tarnish of sterling silver caused by contact with air, skin oils, soap, lotions, and other elements. We suggest keeping the bracelet clean and using a polishing cloth on a regular basis rather than let the tarnish build up. We discourage the use of silver cleaner.

Here is the polishing cloth we recommend http://www.horsekeeping.com/jewelry/cloth/cloth.htm

OLYMPUS DIGITAL CAMERA

The black is not inlay, but an oxidization of the sterling silver for accent.  It might have been your use of silver cleaner that took off some of the black on the front.

Read all about sterling silver care and cleaning here under the category Materials…..scroll down to Silver.

Here for example is one article – there are a number of others.  http://www.horsekeeping.com/jewelry/info/silver-care.htm

Best of luck,
Paula

Dear Paula,

Thank you very much for the information and your help !!
Respectfully yours
Regina

Cleaning Vintage Native American Jewelry

We often get vintage pieces in that have a wonderful patina but also a dash of Alfredo sauce or leftover silver polish in the nooks and crannies.

So how do we clean while preserving the endearing patina?

When we sell vintage pieces, we usually just leave them as is so the new owner can clean them to their personal taste.

But if there is dirt and debris in the stamping or silver work, we remove that. Usually a dry toothbrush and a wooden toothpick is all that is needed.

Loosen debris with a wooden toothpick

Brush with a dry toothbrush

Brushed clean

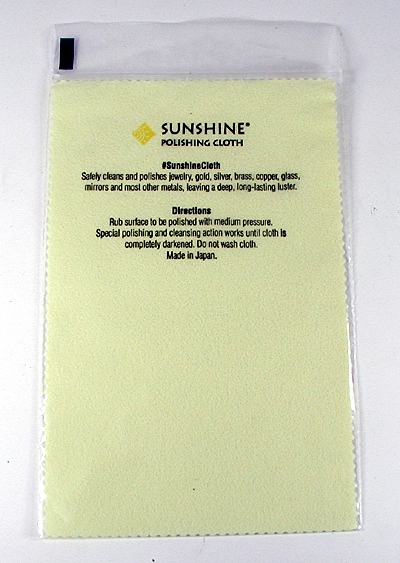
With my personal more contemporary sterling silver pieces (no stones), if I want to restore a brilliant shine, I either buff with a polishing cloth
cloth-sunshine-1

Or use the procedure outlined in “Richard’s Method”.

IMPORTANT NOTES !! Great care should be taken when cleaning any sterling silver piece with stones. The pieces should NEVER be soaked as this would swell the backing (which is often sawdust or leather) and pop the stones out of their settings or damage them.

For sterling silver jewelry with stones and for pieces that I want to retain much of the vintage patina, I usually use a simple wash, dry and light hand buff combo. I use ordinary liquid hand soap (not antibacterial – something more like liquid Ivory) on a cloth or soft toothbrush to loosen debris and clean both the front and back of bracelets and pendants.  Then I rinse it well but carefully, avoiding the stone settings.  I follow this with a thorough drying and then token hand buffing with a silver polishing cloth. I stop at the point where the item is clean but still has its character.

I use a polishing cloth to maintain the shine in my new beads but if the oxidation gets ahead of me, I spritz them with Windex, taking care not to use too much because I don’t want it to run into the holes. I lightly spritz one section and then wipe right away. Less is more.

When Diane Radeke’s repair service was in the process of restringing an old squash blossom necklace for me (the subject of another blog on repair), the topic of cleaning came up and here is what Diane had to say:

While your necklace is disassembled, we’d like to wash the naja and blossoms. As you are definitely in favor of original patina, I want to explain this and get your approval first. I meet many, many people who do not want the surface of their silver touched in any way, not even to be cleaned. To me, there is a big difference in being “cleaned”, being “polished”, and being “buffed”. It’s mostly semantics, but I think there is a lot of confusion about what might be the best way to treat a piece of jewelry.

To me, buffing is something done with a buffing machine, in the shop. Buffing actually smooths the surface of the silver, and removes all those tiny fine lines and scratches that create the soft, beautiful look of a well worn piece. With very few exceptions, I don’t like to see anything buffed. The exceptions would be for pieces that are very contemporary or have a very bad scratch that detracts from the piece. A very few people like their pieces buffed smooth, regardless of the age or history of the piece.

Tiny fine lines and scratches can be replicated by working the surface with steel wool, but a trained eye will spot it every time. It can look nice, but it’s not “patina”… If a piece must be hot soldered for a repair, it must go through the buffing process – no way around it. Our smiths are awesome, but that is one of their biggest challenges – hot soldering on a vintage piece and retaining the “look”.

Polishing is using a chemical agent to clean the blackened tarnish from a piece of silver. Polishing (in my phraseology) doesn’t remove the scratches at all, but it can remove the oxidation that may have been applied to enhance the design of a piece. Oxidation can be very successfully reapplied (chemically) BUT most polishes will leave nasty residues in all the lovely details of this beautiful handmade stuff. The residue turns white or green or pink.  One of the few chemical “polishers” that doesn’t leave a residue (Tarnax) will actually dissolve turquoise and coral, among other things. I can’t tell you how many Tarnax victims we’ve repaired here. Polishing with any of this chemical stuff is really intended only for flatter manufactured pieces, like silverware, and even then, just cleaning it will frequently work better.

So, my favorite and most suggested technique is cleaning. A good washing (done properly, of course) will remove all the gunk, label residue, polish residue, grime, dust, cookie dough (yes we’ve removed that) and any other surface stuff that “shouldn’t be there”. The result is a piece that still has all the fine scratches, oxidation, and beauty (the “patina”) of an old piece, but it will show with a beautiful true silver glow, instead of a flat yellow gray appearance. In my opinion, it really enhances the piece.

We generally wash using the Tide Detergent technique (listed in the comments following the Richard’s Method article) and a soft toothbrush. Then we dry very thoroughly with a cloth which creates just a little bit of a glow.

We don’t wash beads, because they’re too hard to dry out properly. We would wipe them with a cotton glove only.

Thank you Diane for your contribution to this article – Paula