The Eagle Has Landed – Inlay Repair by My Favorite Silversmith

Carlene Leekity Inlay Eagle Necklace – do you see the missing inlay?

When this Carlene Leekity eagle inlay necklace came into the store in an estate lot, I didn’t even notice there was a piece of inlay missing because the backing material was black just like the shell inlay.

Henry and Diane to the rescue !

I’ve been working with Diane Radeke and Henry Yazzie for at least 6 years. Their team has done repairs on many vintage items that have arrived as part of estate lots but needed TLC before we could offer them in our Vintage Shop. Diane is the point person but I think of her more as a shepherdess who guides the project masterfully from start to finish. She determines what needs to be done, what the customer wants, and then confers with her partner, Henry Yazzie, to determine what supplies are needed and what the cost will be. Henry creates wonderful custom jewelry and also does careful, creative, excellent repairs. You can read about other projects we have worked on over the years by simply searching “Repairs” in the search box on this blog.

Henry graciously supplied us with some photos and explained the steps he follows to repair missing inlaid shell or stone pieces in jewelry:

He first examines the missing stone area.  There may be material in the opening that raised the stone or shell to the correct height.  This material may be clear epoxy, which turns brown or yellow over time, Dev-con, which is generally gray, or JB Weld, which is often black.  The base material can stay in place if it is still tight and in good shape. Otherwise it will need to be removed and replaced.

Henry then selects a stone or shell that will be the correct height and size for the opening.  The pen shell for this repair (see photos below) was procured for me by a good friend D. Robert Smith who is an excellent lapidarist at his Dancing Raven Stoneworks LLC.

Pen shell for inlay repair

Some shells and stones cannot be ground down from the face side, so careful sizing is important. Henry cuts a piece of replacement material that is a bit larger than the opening.

Henry then moves to the grinder, which is typical lapidary equipment that uses a water drip feed to keep the stone cool and reduce dust,. There he shapes the first edge of the replacement piece.

.

He then checks the fit to the missing inlay opening. Working back and forth, he continues to grind bit by bit until the replacement piece is a perfect fit for the opening (see the slide show below).

This slideshow requires JavaScript.

Jewelers glue is used to secure the new shell piece in place.

With Zuni inlay, there is no bezel adjustment as found in traditional Navajo jewelry.  The piece must fit perfectly. If it does, it will maintain its fit for many years.

Henry reminds us ! “As with any bezel set jewelry, it is important to not let inlaid jewelry stay wet for any length of time – this could allow backing materials to swell and/or pop the inlay.  And it is particularly important to not bend the jewelry, as that would change the size of the opening and cause stone loss.”

and I add “That’s why we always caution our customers to not try and resize an inlay bracelet! If you do, when bending, the stones could go pop, pop, pop !”

For this eagle necklace, Henry also matched the feather etching on the wings using a Dremel tool.  A final polish removes any rough spots or bits of glue.

What a wonderful repair job !

Repair completed and necklace ready to enjoy for many years to come !
                                                                   Thank you Diane and Henry !
                                                                                                                         Paula

Restringing a Squash Blossom Necklace

When this arrived in a recent estate lot, I went eeek ! and then promptly contacted our favorite repair shop. Although we can make minor repairs and alterations here at our store, we leave something like this to a professional that has experience with Native American jewelry.

A jumble of beads and a broken wire – I wonder if everything is here to make a necklace again??!!

The 14 mm handmade beads are stamped on both side and so are the blossoms – quite rare !

As usual Henry did his magic – straightening any bent blossom petals, balancing all the beads beautifully, making a new hook and eye closure….resulting in a treasure of a necklace.

See this related article

Shortening a Squash Blossom Necklace for Paula

Paula

Closing the Gap on a Native American Inlay Cuff Bracelet

When this beautiful inlay bracelet by Merle House Jr. came into our store,

Inlay Bracelet by Navajo artist Merle House, Jr.

Inlay Bracelet by Navajo artist Merle House, Jr.

I just had to have it…………it matched a pendant and ring I have by him which I love to wear.

BUT the bracelet was gallons too big. Made to fit a 7 1/2″ wrist, I didn’t know if it could be closed up enough to fit my 6 3/4″ wrist.

BEFORE – The 1 3/4″ gap was so large that the bracelet would roll and fall off my wrist.

The silver measured 5 3/4″ end to end. It was the gap that was the bad boy – at 1 3/4″ it would allow the bracelet to roll and fall off my wrist. If it could be closed at least 1/2″, down to a 1 1/4″ gap maximum, I think that could work for me – still enough of a gap to get on and off but it would stay on. It would likely be a little lose but for these big heavy ones, I kind of like them moving a bit.

I asked my go-to repair gal Diane Radeke if Henry could possibly do that and she said “NO PROBLEM!”

P1100413

AFTER – Here it is after resizing – With the gap closed to 1 1/8″, the bracelet now goes on and off very easily and stays put on my wrist !

I asked Diane what is involved in resizing an inlay bracelet and here is what she said:

“It’s a commonly held belief that inlaid bracelets cannot be sized because of the risk of stones popping out or breaking.  It can, however, be done by a skilled silversmith with the right tools, materials and experience.

 
The simplest style to resize have stones inlaid on less than half of the length of the bracelet (like Paula’s). 
Inlay confined to just the front of the bracelet - that's good news in terms of my hopes of getting this resized downward.

The inlay is confined to just the front of the bracelet – that was good news for getting this resized downward.

Special tools and a lot of patience will allow the silversmith to bend only the sections of bracelet that have no stones.  The inlaid portion will not change its shape, and the stones will remain secure.
 

If more than half of the length is covered with stones, the silversmith can lift the stones out of the bracelet, reshape the bracelet, and then carefully set the stones back in place.  There are a few adjustments to be made, however, as the “bed” for the stones will now be a different size.  If the bracelet is being made smaller, the curved bed will become longer – then tiny slivers of stone will be added to fill the gaps.  More difficult is if the bracelet is being made larger – the curved bed becomes shorter so some of the stones will be filed ever so slightly to fit correctly without binding.


Resizing a favorite inlaid bracelet can be time consuming, but may be well worth the investment for the enjoyment of wearing it! “

So here it is back to me and WOW, my dream came true.

P1100411

Many thanks to Diane and Henry for yet another successful jewelry modification/repair !
Paula

New Life for a Cracked Turquoise Stone Bracelet

The estate lots we purchase commonly contain at least a couple of damaged vintage pieces. We have the choice of selling them AS-IS, with extensive tarnish or soil, silver damage, a missing stone, a loose stone, a cracked stone……OR we can have the item repaired so the piece can be used again ! When I see a beautifully crafted necklace, ring or bracelet that would otherwise be tossed in a box to be forgotten, I do whatever I can to help revive the piece.

This beautiful bracelet hallmarked LESTER ORTIZ  and STERLING

weighs 89 grams and is 2 3/8″ tall at the front.

The gorgeous green turquoise stone (I’ll let you ponder the mine – please put your guesses in the comments below) was too good to toss.

I sent this bracelet to Diane at Old Town (see contact information below) who coordinates the work for the Navajo silversmiths there. Henry waved his magic wand over this one and turned it from trash to treasure !  Thank you Henry !!!!

BEFORE

OLYMPUS DIGITAL CAMERA

DAMAGED LESTER ORTIZ BRACELET

OLYMPUS DIGITAL CAMERA

OLYMPUS DIGITAL CAMERA

AFTER

OLYMPUS DIGITAL CAMERA

REPAIRED AND REVIVED BRACELET

OLYMPUS DIGITAL CAMERA

OLYMPUS DIGITAL CAMERA

Paula

Navajo Watch Cuff Switcheroo

I recently purchased a NOS (New Old Stock) watch cuff that had never had a timepiece in it.

OLYMPUS DIGITAL CAMERA

My heavy vintage New Old Stock watch cuff……..looking for a timepiece

I wanted a good timepiece for it, one that would put up with my rugged lifestyle and look good with my fall and winter flannel shirt ensembles….but without breaking the bank. I had researched the Citizen Eco-Drive stainless steel watches and some self winders but all I saw were out of my price range. I looked at manual wind up watches and purchased a Timex that was advertised as having a stainless steel bezel only to find on arrival that it was brass with chrome plating !! So I returned it and put the poor empty cuff on my desk and looked at it for days, weeks……….months……….and then something appeared…………..

Vintage watch cuff with Wenger Stainless Steel Timepiece

Vintage watch cuff with Wenger Stainless Steel Timepiece

An estate lot came in with a number of men’s watches in it. One of the vintage cuffs had a stainless steel Wenger in it and while it looked super cool on that cuff, it was really not functional because you could not grab onto the stem which was flush with the edge of the cuff. The timepiece was really too narrow for that vintage cuff with straight sides. So with the store’s blessings, I pulled a switcheroo.

OLYMPUS DIGITAL CAMERA

From the left, my NOS watch cuff, the vintage cuff with the Wenger watch, a black quartz watch.

The Wenger went into my cuff and because the cuff was sculpted inward on each side specifically to allow access to the watch stem, it was a perfect marriage.

My NOS cuff with Wenger timepiece

My NOS cuff with Wenger timepiece

Fits like a glove and easy to read.

Fits like a glove and easy to read.

A black blanket-pattern quartz watch, that was wide enough so that the stem extended over the straight edge of the vintage watch cuff,  was installed and now that cuff has a functional watch.

Vintage Cuff with black faced quartz watch - stem is now functional

Vintage Cuff with black faced quartz watch – stem is now functional

Happy ending all around.

Thank you to Henry and Diane for their excellent help with custom repairs and modifications.

Paula

Flea Market ring needs repair and hallmark ID

Hi Paula,

I recently picked up this ring at a flea market and would like to get it repaired. There is a piece of corral missing and on the second tip a silver ball is gone.

1photo

I remember reading an article you had about someone that did jewelry repair and would like your opinion on where I should send it.

Also, the mark inside is a D Sterling C Can you tell me who designed this ring?

2photo lightened

Thanks for your help and I love reading all your posts on Native American jewelry,

Sandy

Hi Sandy,

As far as the hallmark, I don’t know for sure so I thought I’d post the ring so others could suggest possibilities.  I’ve seen some similar items by the Navajo family with the last name Clark but I’d be guessing. Maybe someone else recognizes the hallmark and work definitively.

Paula

Repair of my Beloved Chester Mahooty Inlay Bracelet

I received a beautiful old bracelet years ago and sadly one day a piece of inlay disappeared.  I was nervous about shipping the bracelet to someone to fix………that is until I met Diane Radeke (see contact info at the end of the article.)

Here is my personal repair story with a happy happy ending.

Hi Diane,

I have a special inlay bracelet that is missing one piece of inlay which I think might be ivory – cream colored, not white. What do you think? What would it cost to repair this one? Paula

Chester Mahooty bracelet with missing inlay piece.

Hi Paula,

You’re bracelet is so unusual – I just love it! We usually charge about $20 to replace 1 missing stone. But there are many factors that affect that price:

size  – a big stone costs more

type – rare stones like red coral or Bisbee turquoise cost more

number of stones being replaced – 10 needlepoint stones in the same piece might cost only $15 per stone

whether the customer still has the original stone – that might only be $10 for resetting

whether or not any additional work needs to be done in order to repair the setting.

That’s why we always like to examine a piece before giving a firm quote. Of course there is also the shipping charges back and forth that a customer needs to pay.

For your piece, we don’t have ivory, and I’m not sure we could get it. There are, however, some shells that have a creamy appearance and might work nicely in this instance. I believe we also have a white coral that has that creamier appearance, without going into the orange tones. If you can get a piece of ivory, we can cut it and set it. I can see that your center coral has a little issue, too. If it’s not uneven on the surface, it might not be a problem, but if you’d want us to replace that, it would be $25 (red coral is expensive, but we do use the real thing – not dyed).

Hi again Diane,

The bracelet is a 1960s or early 1970s Zuni inlay cuff by the late Chester Mahooty.

On the bracelet, the only thing I want done is to have the one cream piece of missing inlay replaced. Maybe it was ivory (I think ivory was still available at the time he made this as was the tortoise shell that is also in the piece). Since ivory isn’t an option, you suggested using a similar ivory colored shell to match the piece on the opposite side? You’ll see he used cream and white inlay but it is the cream piece that is missing.

I do not want the chipped red coral circle at the top of his tail repaired– just leave it as is. And please don’t buff or polish the piece. I want to keep the patina as is. (See my recent post about cleaning vintage jewelry.)

Hi Paula,

Your bracelet arrived here safe and sound.

First, I feel very clear on what you want for your bracelet, which is a beauty! I love the stamped sides. We will do our best to match with something. The guys are willing to look through their personal stashes to see what they can come up with. Henry will do the inlay a little differently to avoid any errant polishing. They usually would grind the surface of the stone after setting it into the bracelet, but he will cut and finish the stone completely out of the setting, then glue it in. The stone will be a little thinner (depth-wise, but you won’t see it) than doing it the regular way, but this will ensure that the bracelet never gets near the grinder. I do need to mention that there is a crack in the bird’s head, kind of through his eye and cheek, another crack in the turquoise chest, the chip previously mentioned in the coral belly, and a couple of other teeny tiny chips and cracks. Nothing unusual nor in need of repair – I just like to mention these things before it goes back into the shop so you’re aware. I’ll have the guys alert me if they see any weak settings, but I don’t believe they will. The rest of the settings look very good to me.

Fitting the stone

Hi Diane !!!

I received my bracelet and I am so happy. Thank you so much for your good care and Henry’s excellent work !  I have more items to send you. Paula

Cleaning Vintage Native American Jewelry

We often get vintage pieces in that have a wonderful patina but also a dash of Alfredo sauce or leftover silver polish in the nooks and crannies.

So how do we clean while preserving the endearing patina?

When we sell vintage pieces, we usually just leave them as is so the new owner can clean them to their personal taste.

But if there is dirt and debris in the stamping or silver work, we remove that. Usually a dry toothbrush and a wooden toothpick is all that is needed.

Loosen debris with a wooden toothpick

Brush with a dry toothbrush

Brushed clean

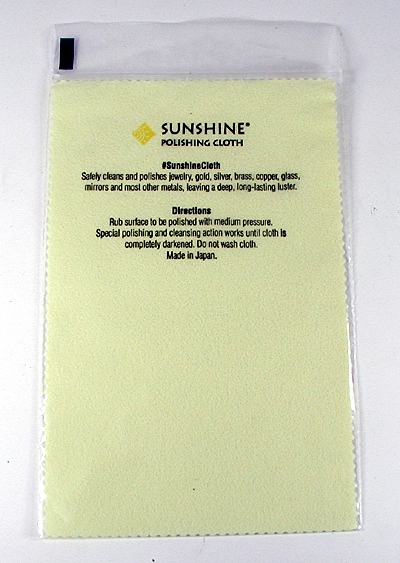
With my personal more contemporary sterling silver pieces (no stones), if I want to restore a brilliant shine, I either buff with a polishing cloth

cloth-sunshine-1

Or use the procedure outlined in “Richard’s Method”.

IMPORTANT NOTES !! Great care should be taken when cleaning any sterling silver piece with stones. The pieces should NEVER be soaked as this would swell the backing (which is often sawdust or leather) and pop the stones out of their settings or damage them.

For sterling silver jewelry with stones and for pieces that I want to retain much of the vintage patina, I usually use a simple wash, dry and light hand buff combo. I use ordinary liquid hand soap (not antibacterial – something more like liquid Ivory) on a cloth or soft toothbrush to loosen debris and clean both the front and back of bracelets and pendants.  Then I rinse it well but carefully, avoiding the stone settings.  I follow this with a thorough drying and then token hand buffing with a silver polishing cloth. I stop at the point where the item is clean but still has its character.

I use a polishing cloth to maintain the shine in my new beads but if the oxidation gets ahead of me, I spritz them with Windex, taking care not to use too much because I don’t want it to run into the holes. I lightly spritz one section and then wipe right away. Less is more.

When Diane Radeke’s repair service was in the process of restringing an old squash blossom necklace for me (the subject of another blog on repair), the topic of cleaning came up and here is what Diane had to say:

While your necklace is disassembled, we’d like to wash the naja and blossoms. As you are definitely in favor of original patina, I want to explain this and get your approval first. I meet many, many people who do not want the surface of their silver touched in any way, not even to be cleaned. To me, there is a big difference in being “cleaned”, being “polished”, and being “buffed”. It’s mostly semantics, but I think there is a lot of confusion about what might be the best way to treat a piece of jewelry.

To me, buffing is something done with a buffing machine, in the shop. Buffing actually smooths the surface of the silver, and removes all those tiny fine lines and scratches that create the soft, beautiful look of a well worn piece. With very few exceptions, I don’t like to see anything buffed. The exceptions would be for pieces that are very contemporary or have a very bad scratch that detracts from the piece. A very few people like their pieces buffed smooth, regardless of the age or history of the piece.

Tiny fine lines and scratches can be replicated by working the surface with steel wool, but a trained eye will spot it every time. It can look nice, but it’s not “patina”… If a piece must be hot soldered for a repair, it must go through the buffing process – no way around it. Our smiths are awesome, but that is one of their biggest challenges – hot soldering on a vintage piece and retaining the “look”.

Polishing is using a chemical agent to clean the blackened tarnish from a piece of silver. Polishing (in my phraseology) doesn’t remove the scratches at all, but it can remove the oxidation that may have been applied to enhance the design of a piece. Oxidation can be very successfully reapplied (chemically) BUT most polishes will leave nasty residues in all the lovely details of this beautiful handmade stuff. The residue turns white or green or pink.  One of the few chemical “polishers” that doesn’t leave a residue (Tarnax) will actually dissolve turquoise and coral, among other things. I can’t tell you how many Tarnax victims we’ve repaired here. Polishing with any of this chemical stuff is really intended only for flatter manufactured pieces, like silverware, and even then, just cleaning it will frequently work better.

So, my favorite and most suggested technique is cleaning. A good washing (done properly, of course) will remove all the gunk, label residue, polish residue, grime, dust, cookie dough (yes we’ve removed that) and any other surface stuff that “shouldn’t be there”. The result is a piece that still has all the fine scratches, oxidation, and beauty (the “patina”) of an old piece, but it will show with a beautiful true silver glow, instead of a flat yellow gray appearance. In my opinion, it really enhances the piece.

We generally wash using the Tide Detergent technique (listed in the comments following the Richard’s Method article) and a soft toothbrush. Then we dry very thoroughly with a cloth which creates just a little bit of a glow.

We don’t wash beads, because they’re too hard to dry out properly. We would wipe them with a cotton glove only.

Thank you Diane for your contribution to this article – Paula

What is my scrap sterling silver jewelry worth?

What determines that jewelry is scrap? It depends on whether something is worthwhile to fix, has sentimental value, whether it is collectible, hallmarked, and other factors. 

Sterling Silver Scrap Native American Jewelry

When you are selling broken or otherwise unsalable sterling silver jewelry, you might be offered scrap price or melt value for the items.

And even if you have undamaged Native American jewelry and you take it to a pawn shop where the pawn broker isn’t interested in or knowledgeable about the value of Native American jewelry, you will likely be offered melt value.

Here’s how you can figure the melt value of your jewelry.

First be sure the items are sterling silver.  If you don’t have an acid test kit yourself, you can take the items to a jeweler to test for you.

Next you’d weigh the items. If there are a lot of stones or materials other than the sterling silver, you could either remove those so you’d get a more accurate sterling silver weight OR you could estimate how much of the weight is stone.  This will vary depending on the piece so you can make your guesstimate and likely the pawn shop owner will make his.

For an example, if a heavy silver bracelet that weighs 125 grams  has stones estimated to be 30% of the weight of the bracelet, then you would have 70% of the weight as sterling silver or 87.5 grams.

125 gram bracelet x .7 = 87.5 grams

Old bracelet used as an example

Sterling Silver Bar – 92.5% Silver
This bar happens to weigh 24.8 Troy Ounces

But sterling silver is only 92.5% silver, so of the 87.5 grams, only 80.9 grams are silver.

87.5 grams of sterling silver x .925 = 80.9 grams of silver

Pure silver bar
Ag is the chemical element symbol for Silver
This bar of silver happens to weigh 100 Troy Ounces

Silver is measured by troy ounces and there are 31.1 grams in a troy ounce. So in 80.9 grams of silver, you would have 2.6 troy ounces of silver.

80.9 grams divided by 31.1 grams per ounce = 2.6 troy ounces of silver

It costs to have sterling silver melted and purified, so if silver is running, say $30 an ounce, you might be offered $30 or less per ounce.

2.6 troy ounces of silver x $30 per troy ounce = $78.

One of the fans broke off my cuff watch bracelet – can it be repaired?

Here is another installment in our Native American jewelry repair series with Diane Radeke:

Question:

One of the silver fans broke off of my watch bracelet.  Can it be repaired?

Answer:

Sure.  Pieces of silver are joined by soldering.  A process called “hot” soldering uses solder made of silver.  “Cold” soldering uses solder made of lead.  Hot soldering is the best method by far for jewelry repair, especially if the piece will have any kind of pressure on it, like a watch bracelet fan or belt buckle pin.  Hot soldering involves heating both the bracelet and the separate fan to very high temperatures, then applying solder and flux (kind of like “metal glue”) to flow between the pieces along the joint.  Cold soldering is a similar process, but the pieces do not have to be heated to as high a temperature.  Hot soldering is routinely used to build a new piece of jewelry, but it is extremely difficult to use successfully for repairs.

Question:

Why can’t my own jeweler solder the piece?

Answer:
Some jewelers may attempt to use cold solder for repair, but it does not attach with nearly the strength of a hot solder repair.  Also, the cold soldering process still requires heat.  Turquoise and many of the other stones and shells routinely used in Native American jewelry are very sensitive to heat, and can actually burn out of the setting.  We do find that most jewelers are honest with their customers and will decline to attempt any repair of this type.

Question:

How do your silversmiths keep the stones from burning?

Answer:

They use a combination of removing any stones that will be near the heated area, and “packing” the rest to keep them cool.  After the soldering is finished, all stones that were removed must be replaced.  We try to remove as few stones as possible during repair to be more cost effective and lessen the chance of any stones breaking during removal.

Question:

What if I’ve lost the fan piece entirely?

Answer:

We can duplicate just about anything.  The silversmiths would cut a matching piece and attach it.

Question:

Can you describe the repair that is pictured?

Answer:

This watch bracelet was missing one fan.  Also, the stones had sunk down into their bezel settings.  Our silversmith made a new fan, removed all of the stones from the band, and soldered the new fan in place.  After the bracelet was oxidized and polished, the silversmith reset the stones and attached the watch into its spot.  This repair cost $125.00.  The watch bracelet is ready to wear and enjoy again!

Cuff watch bracelet with fan replaced